How to Set Up a Chiminea Safely

To set up a chiminea you’ll need to:
- choose where to buy your chiminea
- consider how to get it safely to your property
- choose a safe spot
- purchase wood and tinder
- get fire tools
- learn how to light your chiminea
- cure your chiminea if it’s clay
- enjoy the lovely outdoor warmth and atmosphere of your new chiminea
Choose Where to Buy your Chiminea
Find a chiminea that suits your needs and budget with consideration of how to get it to your property. Online purchases are good because they will usually include delivery.
If you’re still trying to decide on the type of chiminea you should buy check out this article – What is a Chiminea?
Keep in mind that clay chimineas are easily broken so if purchasing locally consider how you’re going to get it home. Chimineas that come with assembly required will be easier to transport.

Decide on a Safe Location for your Chiminea
TIP – Chimineas can be either extremely fragile or very heavy so it’s important you take time and choose a suitable position as the less you move it, the less chance you have of damaging it.
Ok, now let’s think of your available garden space and decide on a safe location for your chiminea.
To do this keep the following in mind:
- must have a flat surface (for chiminea to work efficiently and prevent it toppling over)
- must not be close to house or other buildings
- should not be placed under anything that overhangs – even foliage as this is a fire risk
- fire safe surface – concrete patio etc. Can be placed on decking but you will have to place fire proof paving/ mat creating a hearth
- try to choose a position where you can see the flames from your house – that way you can always keep an eye on the fire
- consider wind direction – where is the smoke going to go? Wind should not blow directly into chiminea mouth as they work most efficiently with the wind behind them

Remember that your chiminea will heat up considerably when lit so if you’re planning on putting it on a deck, you’ll need to put some sort of insulating material on the deck first. This can be anything from a heat mat to slate.
For more information on setting up a chiminea on a deck check out this article.
By placing your chiminea in a location where you can see it from your house, you don’t have to sit outside with it until the fire dies down completely – a lit fire should always be supervised. You can watch it from the warmth of your house until it dies down naturally.
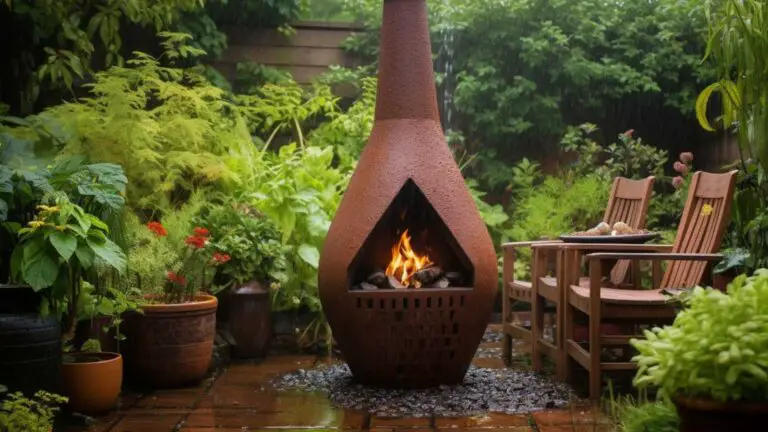
The beauty of a chiminea is the back and sides protect your fire from the wind and even in windy coastal locations, chimineas are an excellent choice. Consider wind direction if your garden is often windy and you’ll be able to use your chiminea as you wish.
IMPORTANT REMINDER – all chimineas today are designed for OUTDOOR use only. Never attempt to use a chiminea indoors as there is serious risk of carbon monoxide poisoning.
Buy Fuel
You’re going to need some fuel to burn in your chiminea. There are lots of places to pick up wood including your local petrol station or garden centre.
Just make sure that the wood you buy will fit in your chiminea as the fire bowl can be quite small. You will need:
- seasoned wood
- seasoned kindling
- newspaper or firestarter (non chemical preferred)
B&M home store is a great place to pick up wood and one of my local favourites – a big bag of kiln-dried birch for only £3.99.
Just make sure you choose a hardwood that’s kiln-dried or seasoned for at least 6 months and you’ll have wonderful fires with minimum smoke.

If your chiminea gets overly smokey, it’s likely that your fuel is not completely dry. Make sure to store wood in a warm dry place and try to use up extra wood at the end of a season so you’re not left storing it over winter.
Get Something to Light your Chiminea
If you need detailed instructions on how to light your chiminea you can read our article on it here. For easy lighting of your chim you’ll need:
Don’t use too much kindling – a few bits is fine and overloading not only wastes money but you’ll start with a super smokey fire as kindling is usually a softer wood that releases more smoke. By all means, use newspaper if you have some but don’t burn garden waste or other unpredictable in your chiminea.
Basic Fire Tools
When using a chiminea remember you’ll be managing a fire, that’s extremely hot and you need tools to do that. The very basic tools you need are:
- heat resistant gloves
- fire poker or tongs
Cure your Chiminea (if it’s a clay chim)
We have a full article on how to cure a clay chiminea. The process is easy to do but really important for clay chims.
If you don’t take the time to cure (season) them there is more chance of you damaging your chim due to thermal shock (change in temperature of clay). You only have to take a look at the reviews on clay chimineas on any website to see how often people are cracking them.

You may need 4 or small fires and when you do get a regular size fire going, keep it small – no more than a few logs at a time. Please take your time with this as it’s a common beginner mistake.
Curing involves setting a few small fires and letting them cool down completely before lighting a proper fire.
Maintain Your Chiminea
There are a few simple things you can do to maintain your chiminea and make it last as long as possible.
- clean it out after every use
- check for small cracks reguarly (particularly with clay)
- seal or paint once a season
- cover when not in use
- bring inside over winter if possible – garage is perfect
Enjoy
Congratulations! You have successfully added a delightful chiminea to your outdoor space that should give you many hours of enjoyment in your garden.
For more info about me, check out my About page.